
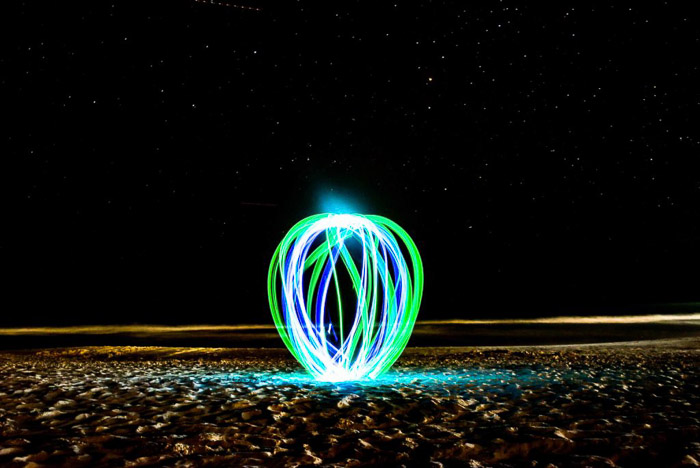
Painting light is a simple and a fun activity to do with everyone from kids to advanced photographers. It’s referred to as light painting because that’s precisely what you’re doing while your shot is being captured — painting with light.
Luminar 4Your photography. Elevated.
Replace the sky in your photos, instantly! Boost details with AI Structure. Discover more amazing tools in the new Luminar 4.
- AI Sky Replacement
- AI Structure
- 60+ cutting edge features
- Instant Looks
- And more
From what you need, to camera settings, to technique tips — the Skylum team has put together some light painting photography basics that will help you feel ready and eager to start painting your world with all sorts of colorful light.
What Is Light Painting?
In light painting photography, you’ll use handheld light to paint a scene while the camera’s shutter left open during a long exposure. And the good news is, it’s super simple once you get the hang of it.
You can paint everything from words to swirls to shapes to wild flying animals — anything that ignites your creativity and inspires your photo-taking.
What You Need
Camera: For light painting, it’s best to use a DSLR camera that can be set manually (though you can also use film cameras).
Tripod: Light painting requires long exposures, so use a tripod to avoid camera shake.
Light Source: For light painting, you’ll need a light source! Photographers commonly use flashlights, pen lights, laser pointers etc.
Camera Settings
Go for a shutter speed between 11 and 30 seconds for a longer exposure, an aperture between f/8 and f/32 and an ISO of 100 or 200.
Create the Shot
To get the shot, choose a dark environment and decide on a focal point before locking the manual focus. Set your timer (or use a shutter release) to ensure that you have enough time to get to your object and begin painting. Move the light from your chosen light source in whichever way you desire and when the shot is done, take a peek. Adjust your camera’s settings as necessary to achieve the exact creative end result you’re looking for. It may take a few times to get it right — but with light painting, experimentation is half the fun.
Technique Tips
There are a few primary tips and techniques shared from painting pros over the years. As you get more comfortable with the basics of light painting, keep these technique tricks in mind.
- Try to paint from the sides, as it will work to bring out texture.
- Keep in mind that different surfaces will produce different results (i.e. wood, metal, glass etc.)
- Use different angles to produce three dimensional effects.
- Stay moving and wear dark non-reflective clothing.
When you initially begin light painting, you’ll find it a fun experimentation to do with fellow photography enthusiasts. Painting name, create swirls and spirals, anything you can image. And as you learn more and practice, you can use light painting as an incredible and creative resource in both professional and hobby photography.
Plus, the feeling of being able to actually paint light is one that may never leave you bored.
From all of us at Skylum, have fun exploring the infinite world of light!